Installation – TDSBot
There many configurations of water purifiers.
From simple single cartridge water purifier, Reverse Osmosis (RO) systems to
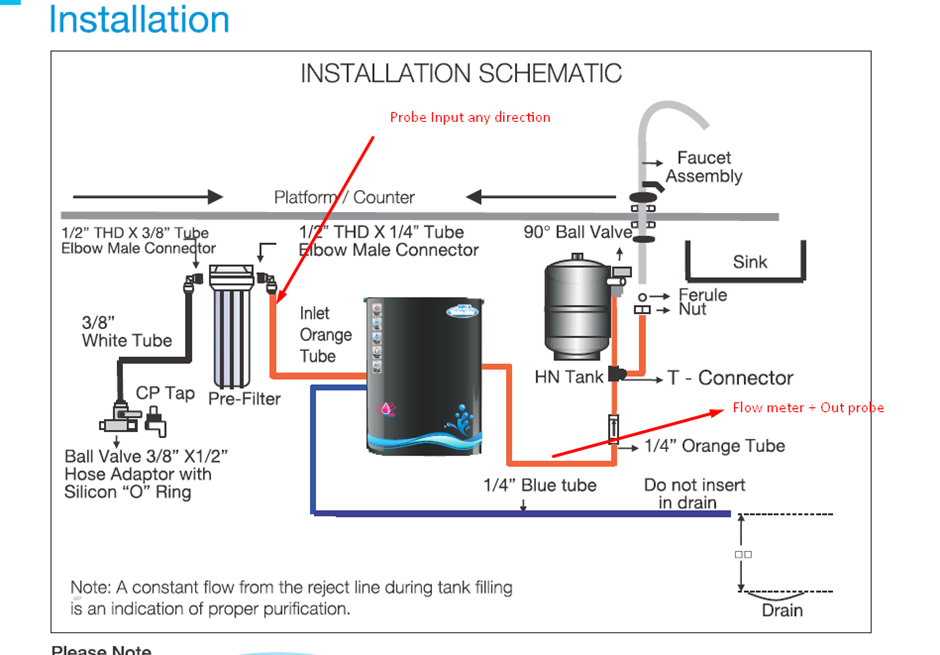
custom configured systems. The below procedure is for a RO System. The typical
installation will have an Inlet probe, Outlet probe. The flow meter could be
installed either at the inlet or outlet. Outlet preferred for RO systems.
There are two kinds of RO water filter systems
– Under sink and counter top. In under sink RO systems, the TDSBot is easy to
install as all the filters are easily accessible. In Counter Top systems, it
may be necessary to open the system to install the flow meter and the filtered
water probe. Sometimes, professional help may be required. Please check with
the manufacturer for any warranty issues.
Nearly all Reverse Osmosis Water filter systems
have the following basic structure.
1 Sediment Filter, 2-GAC 3 CTO 4 Reverse Osmosis Membrane 5 Post Carbon
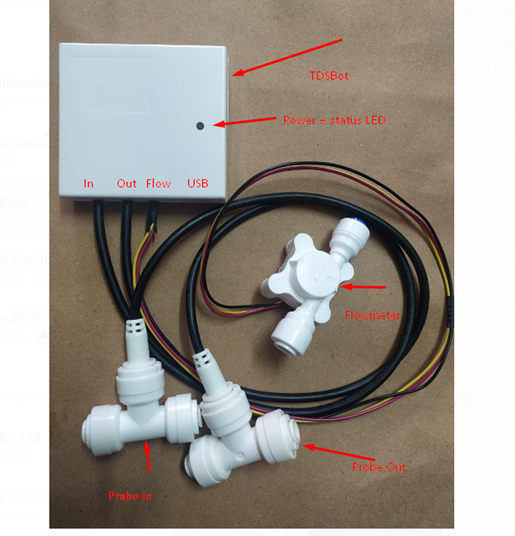
The TDSBot system is as follows:
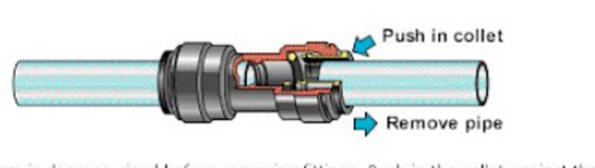
Now some basics of working with the fittings and pipes. Nearly all RO systems use a compression fitting system for the pipes.
They have the following features. This will be used throughout to install the probes and flowmeter.
A] Removing a pipe:
The housing has a collet that is used to facilitate the insertion and tight fit of the compression fitting. By pushing and holding the collet down the pipe can easily be removed.
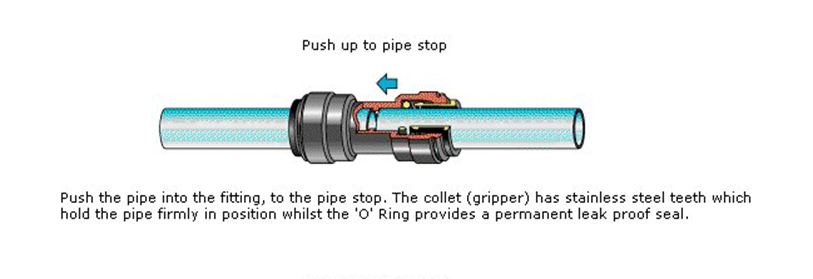
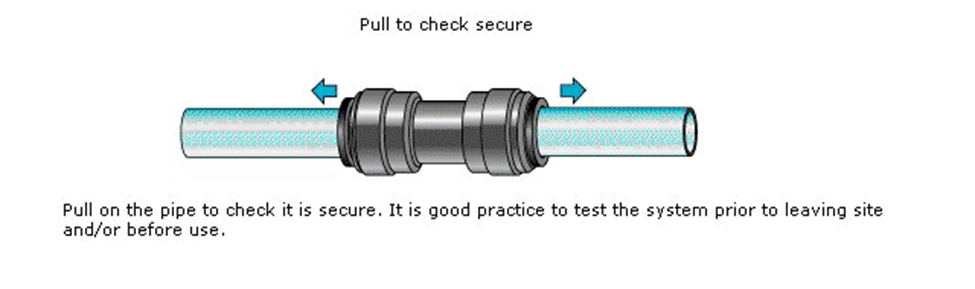
B] Inserting a pipe: To insert a pipe, push and hold the collet and insert the pipe until the pipe has been inserted to its stop
C] To check if the seal is tight pull on the pipe so that the collect comes out a little bit.
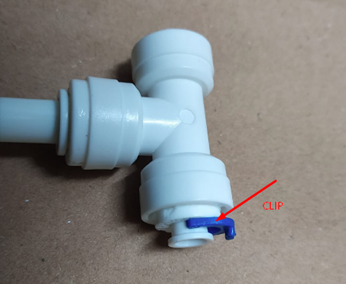
D] After inserting pipe, insert the clip if present into the collet so that it does not move.
Now the installation procedure:
The Input to the 1st cartridge [sediment filter] is the incoming water supply. Most systems have a ¼ “tube. We can support the 3/8 inch pipe with a bigger T Junction.
A] Please make sure that water is off. Place a cloth under the pipe going into the filter 1. Take out the pipe going into this filter [Sediment] at place marked 1. [See above procedure for removing and inserting the pipes]. This is done by pressing a small circular collet around the pipe and pulling pipe out.
Now we need to install the probe marked IN. The kit will contain 3 small ¼ inch pipe pieces. Press one of the small tube into one side of the T Junction.

B] The Out Probe and Flow meter are inserted after the RO membrane, in the pipes marked purified water. Please note that if these pipes are not accessible you can insert the probe and flowmeter after the last cartridges -Post Carbon. The output probe should never be put after a mineralizer cartridge or after TDS controller in case these are present. Doing so will not provide you with any meaningful results about RO Membrane performance.
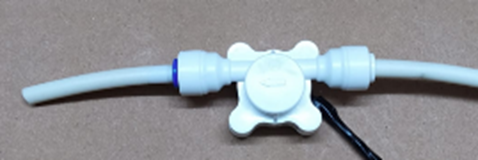
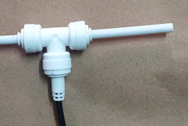
The order of the flowmeter and T-junction for output probe is as below.
Take out one end of the tube after the RO Membrane cartridge – insert that into the flowmeter making sure the water flow direction marked on flowmeter is the same as the flow of water. Then attach the small tube into the other end of the flow meter. Attach this to the OUT probe. Now attach the other end of the pipe into the Out probe.
You are done.
Turn on the water and make sure there are no leaks.
Power the TDSBot through a USB cable connected to a USB adapter [sold separately]
The green light on the TDSBot will go on and off and turn solid green.
Now download the WaterTDS TDSBot app, create an account and follow the instructions on the screen
For setting up the system see steps here.